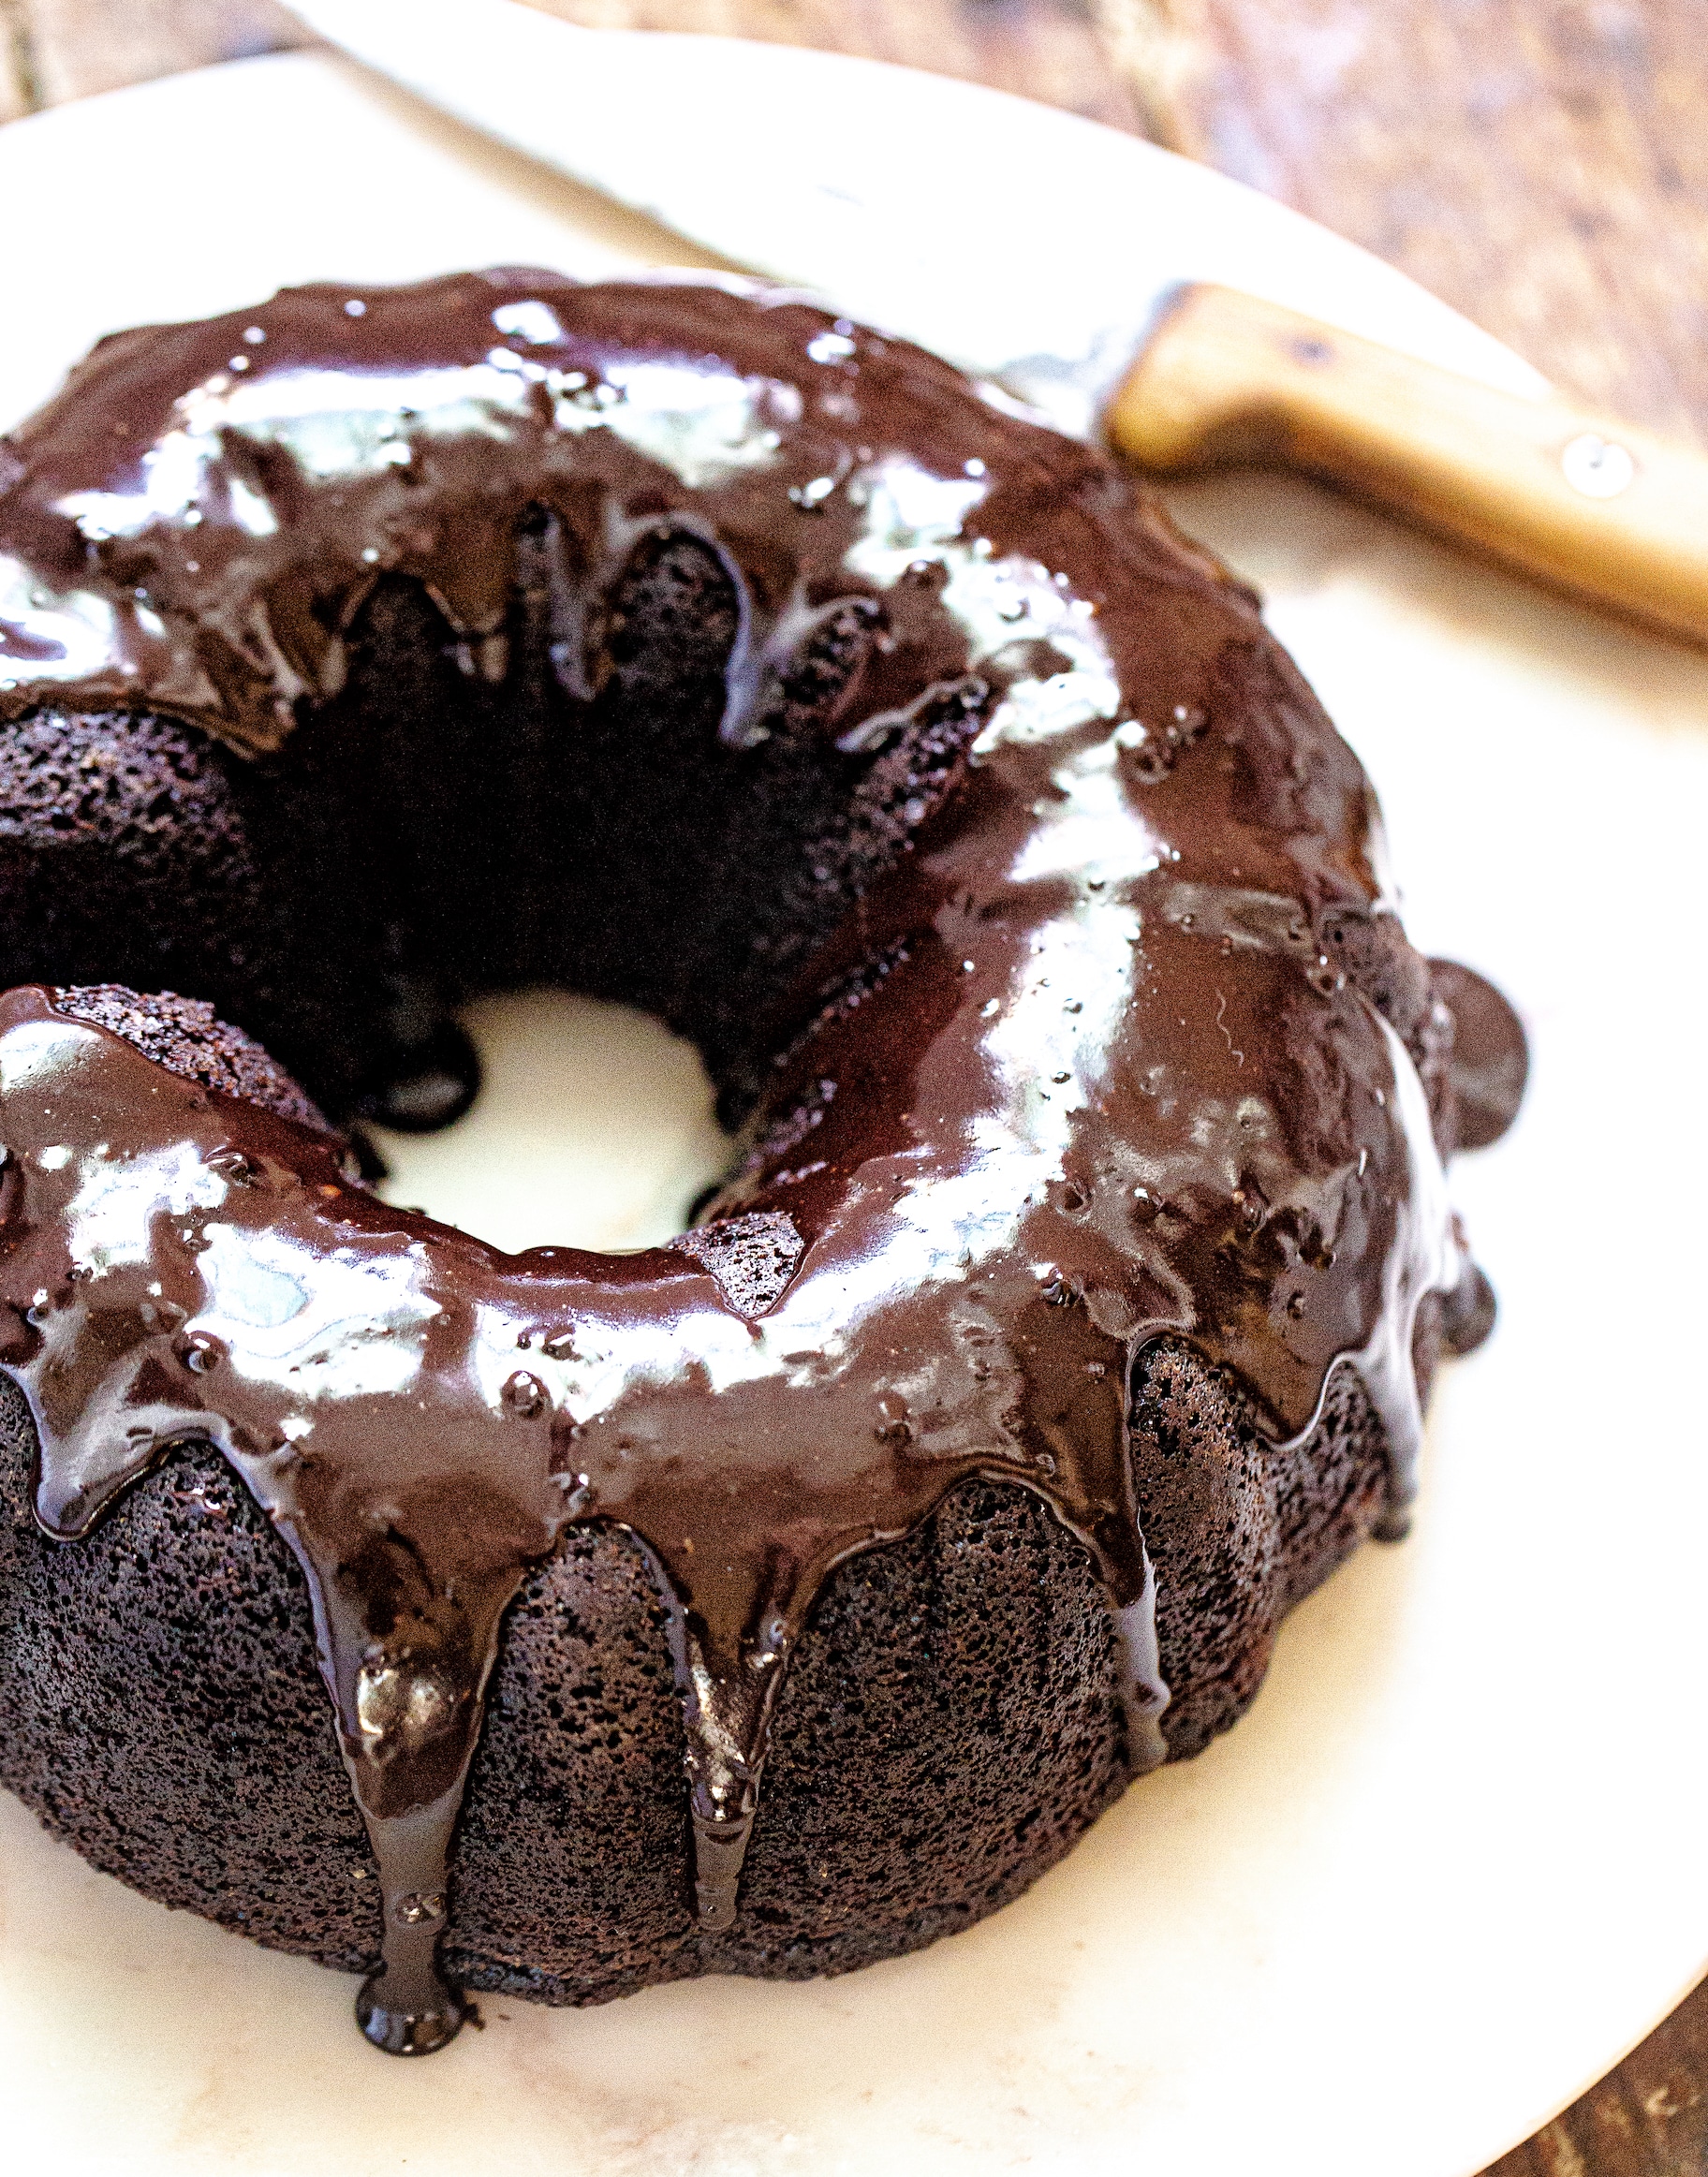
Today I’m sharing a personal favorite thing. A shiny, glistening, glossy-as-all-get-out chocolate glaze that looks stunning on basically any cake or sweet treat upon which you choose to pour it. This easy Chocolate Mirror Glaze doesn’t require any tricky or less-than-familiar ingredients (I’m looking at you, gelatin) and it comes together in all of oh, I dunno … five minutes? Yes, it’s that quick and it’s just so perfect. A true baker’s back pocket recipe if ever there was one.
What is Chocolate Mirror Glaze?
If you’ve ever even remotely glanced at almost any episode of The Great British Baking Show (or Bake Off), then chances are you’ve heard the term, “mirror glaze.” Basically a chocolate mirror glaze (or “Glacage Chocolat,” in French) is a shiny glaze used for cakes. It gets its trademark intense sheen from the addition of gelatin, which also helps it to set up as it’s poured down over cakes that have been cooled. You’ll see dark, chocolatey mirror glazes as well as colorful, almost hypnotically prismatic glazes made with white chocolate that has been colored.
Now. This is a great thing, a classic mirror glaze. But I personally like the version that I’m sharing with you today. It requires no gelatin and no corn syrup, and comes together with just five simple staple ingredients (okay six, if you add the optional liqueur). I think having a simple shiny chocolate cake glaze recipe around is super handy, and this one not only looks great – it tastes wonderful, too.
Troubleshooting your chocolate mirror glaze
This really is such a simple recipe – you should be able to execute it with zero problems. But that said, we’re human! Life throws curveballs! We get distracted and lose focus (squirrel!). So, I’ve got some solutions here for you, should life throw things your way that derail your mirror glaze efforts a little bit (or, a lot).
Common problems with chocolate glaze and how to solve them
- Too runny. If your glaze is just too thin – too runny – you can easily fix this by simply adding more chocolate chips/chopped chocolate until the consistency has thickened back up for you. Just because I’ve given you strict amounts in the recipe doesn’t mean you can compensate as need be, should things not look or feel quite right to you. Various factors such as brand type, temperature, and even cookware can cause slight differences in one glaze to the next. So, if yours winds up too runny you can add more chocolate until it’s nice and rich for you.
- Too thick. See above! But if it’s too thick, simply add a little more half and half or honey until it’s wonderfully drizzle-able. You do want to allow your glaze to cool for a few minutes before pouring it on any cake that has buttercream, as warmth will obviously mess with that … it will melt it right off.
- Lumpy. If you’re getting lumps in your glaze just switch to either a whisk or even a fork, as you need to use a tool that will break and bust up those clumps (which are just cocoa powder). Keep at it, and they’ll eventually break apart and the glaze will smooth out for you.
- Glaze won’t stay put! If the cake(s) you’re working with are at all warm, then you’re going to run the risk of the glaze – your perfect glaze! – slip sliding away on you. So, a good rule of thumb is to avoid heat with all aspects of the equation, both cake and glaze. The cake needs to be – at most – room temperature. But cold cakes are fine, so long as you don’t have some frozen, thawing thing on your hands that could gather some condensation. That would also cause the glaze to slide right off.


What You’ll Need
The combination of simple baking staples comes together to make one ultra shiny, glistening glaze that just really looks stunning when poured over well … basically anything. You could even use it as a lush dip for fruit or for a glossy tray of chocolate dipped strawberries! Up you to as to how you go about drizzling it. But just be sure that you use every single solitary last drop.
INGREDIENTS
- 1 tablespoon butter
- 3 tablespoons half and half
- 1 tablespoon honey
- 1 tablespoon cocoa powder
- ¼ cup chopped semi sweet or dark chocolate
- 1 tablespoon coffee liqueur or chocolate liqueur (optional)


How to make this super easy gelatin-free Chocolate Mirror Glaze
- Melt the butter in a small saucepan set over medium heat. Add the half and half, honey, and cocoa powder. Once smooth, turn off the heat and add the chocolate chips, stirring to melt and blend. Add the liqueur, if using, and test for “drizzability.” If it seems too thick to pour, you can thin with more honey or half and half until it’s the right consistency.
- Pour over any cake you like, but if you use it with a frosted cake, allow the glaze to cool before pouring, as it will melt buttercream.

If you like the looks of this easy chocolate mirror glaze recipe, you might also want to check out:
Peanut Butter Stuffed Chocolate Sugar Cookies


Salted Toffee Mini Chocolate Chip Cookies

Easy Chocolate Mirror Glaze (gelatin free)
A simple albeit untraditional way to create a shiny, glossy chocolate mirror glaze that requires no gelatin and only 5 ingredients and 5 minutes to make. Use it on any cake you like!
- Yield: Makes about 1/3 cup, easily multiplied 1x
Ingredients
- 1 tablespoon butter
- 3 tablespoons half and half
- 1 tablespoon honey
- 1 tablespoon cocoa powder
- 1/4 cup chopped semi sweet or dark chocolate
- 1 tablespoon coffee or chocolate liqueur (optional)
Instructions
- Melt the butter in a small saucepan set over medium heat. Add the half and half, honey, and cocoa powder. Once smooth, turn off the heat and add the chocolate chips, stirring to melt and blend.
- Add the liqueur, if using, and test for “drizzability.” If it seems too thick to pour, you can thin with more honey or half and half until it’s the right consistency.
- Pour over any room temperature cake you like, but if you want to use it on/over a frosted cake, allow the glaze to cool quite a bit before pouring, as it will melt buttercream. A thinner glaze works better in this case, as it will thicken up for you as it cools.
Notes
I like to stir in a little flavored liqueur to my chocolate mirror glaze, and I recommend trying a good coffee flavor variety or a creamy chocolate liqueur. Cognac is also a good choice. Either would be great, and add a nice layer of depth to the glaze, and ultimate to the cake as well.
Keywords: Chocolate Mirror Glaze


