
Today’s post is a two-part story. First, I’m going to share how I re-heat fried chicken – getting that double crunch effect that perks a pre-fried, cold or day-old fried chicken right back up, transforming it into something even better than it was to begin with. Secondly, I’m going to share the fried chicken recipe from my cookbook – Smoke, Roots, Mountain, Harvest. That way, if you want to make freshly fried chicken, you’ll have what I think is the very best recipe for the stuff out there. I’m biased, sure, but it’s my favorite.
Of the 82 recipes that I published in my first cookbook, Smoke, Roots, Mountain Harvest – none have been so beloved by readers than the fried chicken. I’ve had people write me and message me about their chicken adventuring, most all of whom have claimed my recipe to be “the best fried chicken I have ever made or had.”
WHAT!? That’s about the best praise one can receive … at least if that one happens to be a writer of recipes. Fried chicken is a special thing, and being that I am a good Kentucky girl, I take mine rather seriously, I do. I don’t mess around.
If I’m going to go to the effort of making my own, it better darn well be the best, or else I can just walk down the street to the corner grocery store here in Charleston, SC where they fry a mean chicken, and it would save me the time and dishes.

BUT.
This chicken is the perfect example of the kind of recipe that is worth it. IT’s worth the dietary splurge. It’s worth the time it takes to marinate and pre-cook and fry and then, if you want to be extra like we are here in this version – the time it takes to paint on a sweet chili garlic glaze and then crisp up just a little bit more.
And yes, it’s worth the dishes.

Choose Your Own (Chicken) Adventure
With this recipe you can either: 1. Make the whole thing from start to finish … frying up the chicken from my book and then adding the sticky chili garlic sauce. That would be the ultimate.
OR, you could 2. Use the chili garlic sauce to jazz up some already fried chicken, maybe some leftover or some that you purchased elsewhere (grocery store fried chicken is the best). This sauce and quick-crisp method is really great when you want to breathe new life into some day-old chicken.
In addition to sharing the fried chicken recipe from my book, along with this sticky sweet chili garlic sauce, I’m also going to show how I like to re-heat already fried chicken. It’s a great thing to know how to do, I think, and it’s very simple to boot.

The Buttermilk & Herb Fried Chicken from Smoke, Roots, Mountain, Harvest
The chicken is the ultimate, I think, and certainly breaks away from my standard Kitchen Little rules of minimal ingredient and time requirements. But it’s special to me, a big hit in my first cookbook, and I wanted to share it here with you, as well.
Here’s what makes it special:
We’ll fry up some fresh herbs (tied together in a little bundle) as well as a whole head of garlic, right in the same oil in which we’re going to fry the chicken. This is flavor upon flavor upon flavor – the herbs + garlic serving to infuse the frying chicken with a depth of herby, garlicky goodness that makes it sing when it hits your mouth.
Ahem.
We’re also going to roast the chicken before frying it. Yes, this means you’ll have to get out another pan, but it makes the frying part SO MUCH EASIER. The insides of the chicken will basically be cooked, so you don’t have to play that guessing game while they fry, worrying that the skin will burn or get too dark before the insides are cooked all the way through.
Nope, you won’t have to worry about that at all here. We’ll roast up the chicken pieces, get them nice and juicy on the insides, and then we’ll send them into the hot oil to crisp up and fry until golden brown and perfect.

Buttermilk & Herb Fried Chicken from Smoke, Roots, Mountain, Harvest: The Breakdown
What makes this chicken so special – so stinking flavorful – is the fact that we’re going to fry some fresh herbs in the cooking oil before the chicken goes in. The inspiration for this trick came from Tyler Florence, and I thought it was brilliant. Those herbs will add flavor to the oil, therefore further flavoring the chicken itself. The fried herbs are delicious served right with the chicken, crumbled over top. You can skip the herbs step entirely though, as well as the garlic – and your chicken will still be wonderful.
What you’ll need:
4 TBSP salt
4 TBSP black pepper
1 TBSP + 2 tsp poultry seasoning
1/4 cup + 2 tsp garlic powder
Two 3.5 to 4 lb. whole chickens, cut up (the butcher will do this for you, but they’re also often sold this way)
1/4 cup olive oil
4 cups buttermilk
1.5 TBSP hot sauce
Canola oil, for frying
4 fresh rosemary sprigs
5 fresh thyme sprigs
4 fresh sage leaves
1 head of garlic, broken into cloves, cloves peeled
2 cups all purpose flour
1/2 cup corn starch
1/4 cup onion powder
You will also need kitchen string and a meat thermometer (if making the fried herb bundle)
How to make it:
Preheat the oven to 250 degrees F. In a small bowl, whisk together 2 TBSP of the salt, 2 TBSP of the pepper, 1 TBSP of the poultry seasoning, and 2 tsp of the garlic powder. Lay the chicken pieces in a roasting pan. Drizzle them with the olive oil and then rub the spice mixture all over them. Roast for 1 hour and 20 minutes or until a thermometer inserted into the thickest part of the thighs registers 150 degrees F. Remove from the oven and let the chicken cool in the pan.
In a large bowl, which the buttermilk together with the hot sauce. Add the cooled chicken and toss to coat. Cover and refrigerate for at least 45 minutes.
Meanwhile, in a large cast iron skillet or heavy-bottomed/deep-sided pan, heat about 1.5 inches of canola or vegetable oil to 350 degrees F. Using kitchen string, bundle together the rosemary, thyme, and sage. Put the bundle in the hot oil along with the peeled garlic cloves. When the herbs have crisped and the garlic is starting to lightly brown, transfer them to a paper towel-lined baking sheet or plate to drain. Set aside if you’d like to use them as a garnish; leave the oil in the pan.
Meanwhile, in a large bowl, whisk together the flour, the cornstarch, the remaining ¼ cup garlic powder, the onion powder, the remaining 2 tsp of poultry seasoning, the remaining 2 TBSP salt, and the remaining 2 TBSP pepper.
It’s best to work in batches with this, so remove half of the chicken pieces from the buttermilk, allowing the excess to drip into the bowl. Dredge the chicken in the flour mixture, pressing it down gently so the flour and spices stick.
Reheat the seasoned oil to 360 degrees F. Fry the chicken pieces in the oil, being careful not to crowd the pan, and turning them once halfway through cooking, until they are golden brown and a meat thermometer inserted into the thickest part of each piece registers 160 degrees F; 6 to 8 minutes.
Transfer the fried chicken to a paper towel-lined baking sheet to drain. Let the oil return to 360 degrees F before you dredge and fry the remaining chicken (don’t dredge your chicken early, or the flour will soak into the meat, keeping it from getting a crispy, crunchy exterior.

How to Reheat Fried Chicken
By taking the already crispy fried chicken and coating it in this sticky sweet chili garlic glaze and then baking it for a few minutes, we’ll further crisp up the skin and flavor it incredibly.
This is really the best trick for reheating fried chicken, as it just wakes everything up. Those pieces that were trying to get all soggy on you will snap back into crispy shape, and it only takes a few minutes to achieve this.
The chicken won’t dry out by crisping it up for a few minutes in a 350 degree oven.

Sticky Chili Garlic Fried Chicken: The Breakdown
What you’ll need:
8 pieces fried chicken (or however many pieces you have)
¼ cup soy sauce
¼ cup sweet chili sauce
1.5 tsp garlic powder (fresh garlic runs the risk of burning)
8 pieces fried chicken (or however many pieces you have)
¼ cup soy sauce
¼ cup sweet chili sauce
1.5 tsp garlic powder
1 TBSP rice wine vinegar
How to make it:
- Preheat the oven to 350 degrees F. Adjust the rack to the middle position. Place a baking rack over a large sheet pan and arrange the fried chicken pieces on top.
- In a small saucepan set over med-low heat, combine the soy sauce, sweet chili sauce, garlic powder, vinegar, and ¼ cup water. Simmer for 8 to 10 minutes, or until slightly reduced. This thickens the sauce and intensifies the flavors.
- Paint/brush this sticky chili glaze all over the chicken pieces, as best you can, ensuring you get an even coating. Bake for 7 to 8 minutes or until you can see the tips of the chicken pieces beginning to brown. Serve hot/warm with extra sauce on the side for dunking/dipping (see note).

If you like the looks of this Double Crunch Chili Garlic Fried Chicken, you might want to check out:
Hot Honey Dripped Oven Fried Chicken Sandwiches


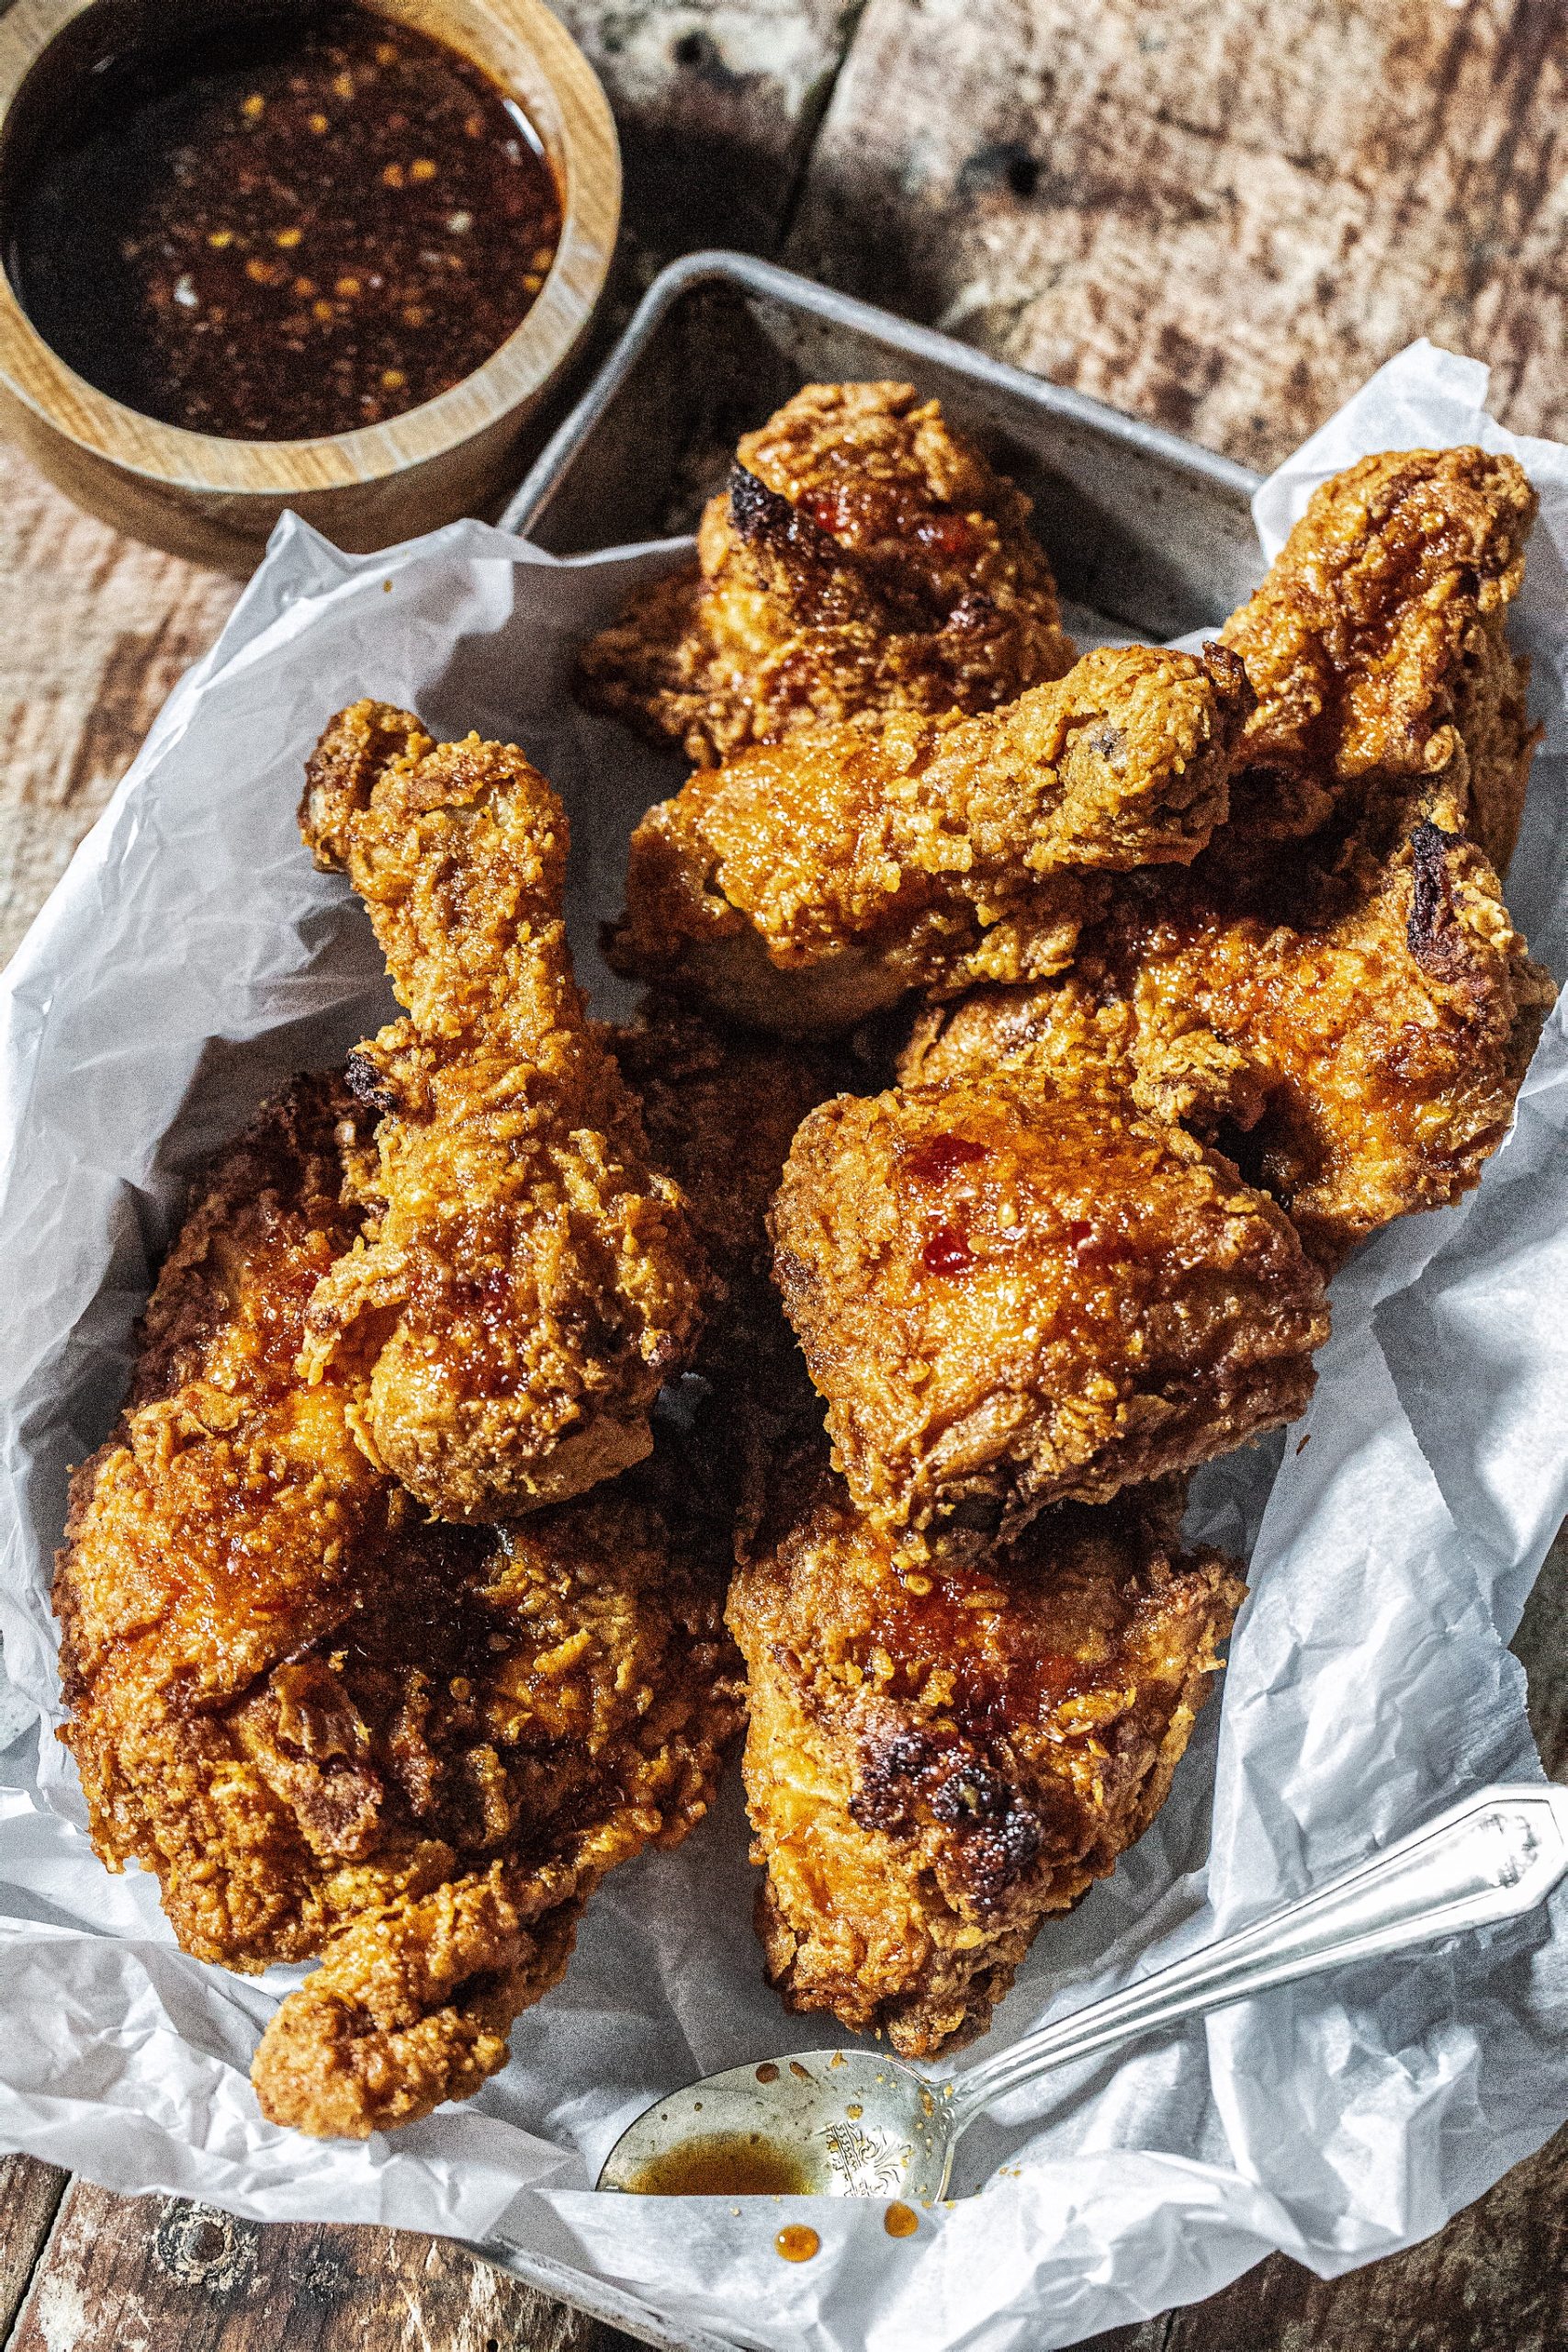
Sticky Chili Garlic Fried Chicken

This is my favorite way to reheat and re-crunch-ify fried chicken. Sheet pan with baking rack + hot oven + special glaze = fried chicken magic. This works great with chicken that you fried yourself or chicken that you picked up somewhere else – it’s all the same. By sending the pieces into a hot oven, coated in this sticky-sweet-salty chili garlic glaze, it will perk right back up for you.
- Yield: Makes 8 pieces, easily adjusted 1x
Ingredients
8 pieces fried chicken at room temp, not cold (or however many pieces you have)
¼ cup soy sauce
¼ cup sweet chili sauce
1.5 tsp garlic powder
1 TBSP rice wine vinegar
Instructions
- Preheat the oven to 350 degrees F. Adjust the rack to the middle position. Place a baking rack over a large sheet pan and arrange the fried chicken pieces on top.
- In a small saucepan set over med-low heat, combine the soy sauce, sweet chili sauce, garlic powder, vinegar, and ¼ cup water. Simmer for 8 to 10 minutes, or until slightly reduced. This thickens the sauce and intensifies the flavors.
- Paint/brush this sticky chili glaze all over the chicken pieces, as best you can, ensuring you get an even coating. Bake for 7 to 8 minutes or until you can see the tips of the chicken pieces beginning to brown. Serve hot/warm with extra sauce on the side for dunking/dipping (see note).
Notes
NOTE: If I choose to serve the glaze as a dipping sauce with the finished chicken, I often add a little more water to it, along with some additional chili sauce or some honey. This cuts the saltiness.
Keywords: How to re-heat fried chicken
Buttermilk & Herb Fried Chicken from Smoke, Roots, Mountain, Harvest

My Grandma Nora’s sister, Great Aunt Bama, lived in the small town of London, KY, and grew up near Colonel Sanders himself. Whether or not she actually snagged the secret recipe for his beloved fried chicken, I’m not altogether sure. But sometimes when we visited her, she’d have fried chicken out on her kitchen counter, along with many other beautiful scratch-made goods. I like to think she’d be proud of my version of the classic.
- Yield: 8 servings
Ingredients
4 TBSP salt
4 TBSP black pepper
1 TBSP + 2 tsp poultry seasoning
1/4 cup + 2 tsp garlic powder
Two 3.5 to 4 lb. whole chickens, cut up (the butcher will do this for you, but they’re also often sold this way)
1/4 cup olive oil
4 cups buttermilk
1.5 TBSP hot sauce
Canola oil, for frying
4 fresh rosemary sprigs
5 fresh thyme sprigs
4 fresh sage leaves
1 head of garlic, broken into cloves, cloves peeled
2 cups all purpose flour
1/2 cup corn starch
1/4 cup onion powder
You will also need a meat thermometer and kitchen string (if making the fried herb bundle).
Instructions
- Preheat the oven to 250 degrees F. In a small bowl, whisk together 2 TBSP of the salt, 2 TBSP of the pepper, 1 TBSP of the poultry seasoning, and 2 tsp of the garlic powder. Lay the chicken pieces in a roasting pan. Drizzle them with the olive oil and then rub the spice mixture all over them. Roast for 1 hour and 20 minutes or until a thermometer inserted into the thickest part of the thighs registers 150 degrees F. Remove from the oven and let the chicken cool in the pan.
- In a large bowl, whisk the buttermilk together with the hot sauce. Add the cooled chicken and toss to coat. Cover and refrigerate for at least 45 minutes.
- Meanwhile, in a large cast iron skillet or heavy-bottomed/deep-sided pan, heat about 1.5 inches of canola or vegetable oil to 350 degrees F. Using kitchen string, bundle together the rosemary, thyme, and sage. Put the bundle in the hot oil along with the peeled garlic cloves. When the herbs have crisped and the garlic is starting to lightly brown, transfer them to a paper towel-lined baking sheet or plate to drain. Set aside if you’d like to use them as a garnish; leave the oil in the pan.
- Meanwhile, in a large bowl, whisk together the flour, the cornstarch, the remaining ¼ cup garlic powder, the onion powder, the remaining 2 tsp of poultry seasoning, the remaining 2 TBSP salt, and the remaining 2 TBSP pepper.
- It’s best to work in batches with this, so remove half of the chicken pieces from the buttermilk, allowing the excess to drip into the bowl. Dredge the chicken in the flour mixture, pressing it down gently so the flour and spices stick.
- Reheat the seasoned oil to 360 degrees F. Fry the chicken pieces in the oil, being careful not to crowd the pan, and turning them once halfway through cooking, until they are golden brown and a meat thermometer inserted into the thickest part of each piece registers 160 degrees F; 6 to 8 minutes.
- Transfer the fried chicken to a paper towel-lined baking sheet to drain. Let the oil return to 360 degrees F before you dredge and fry the remaining chicken (don’t dredge your chicken early, or the flour will soak into the meat, keeping it from getting a crispy, crunchy exterior.
Keywords: Smoke, Roots, Mountain, Harvest Buttermilk & Herb Fried Chicken