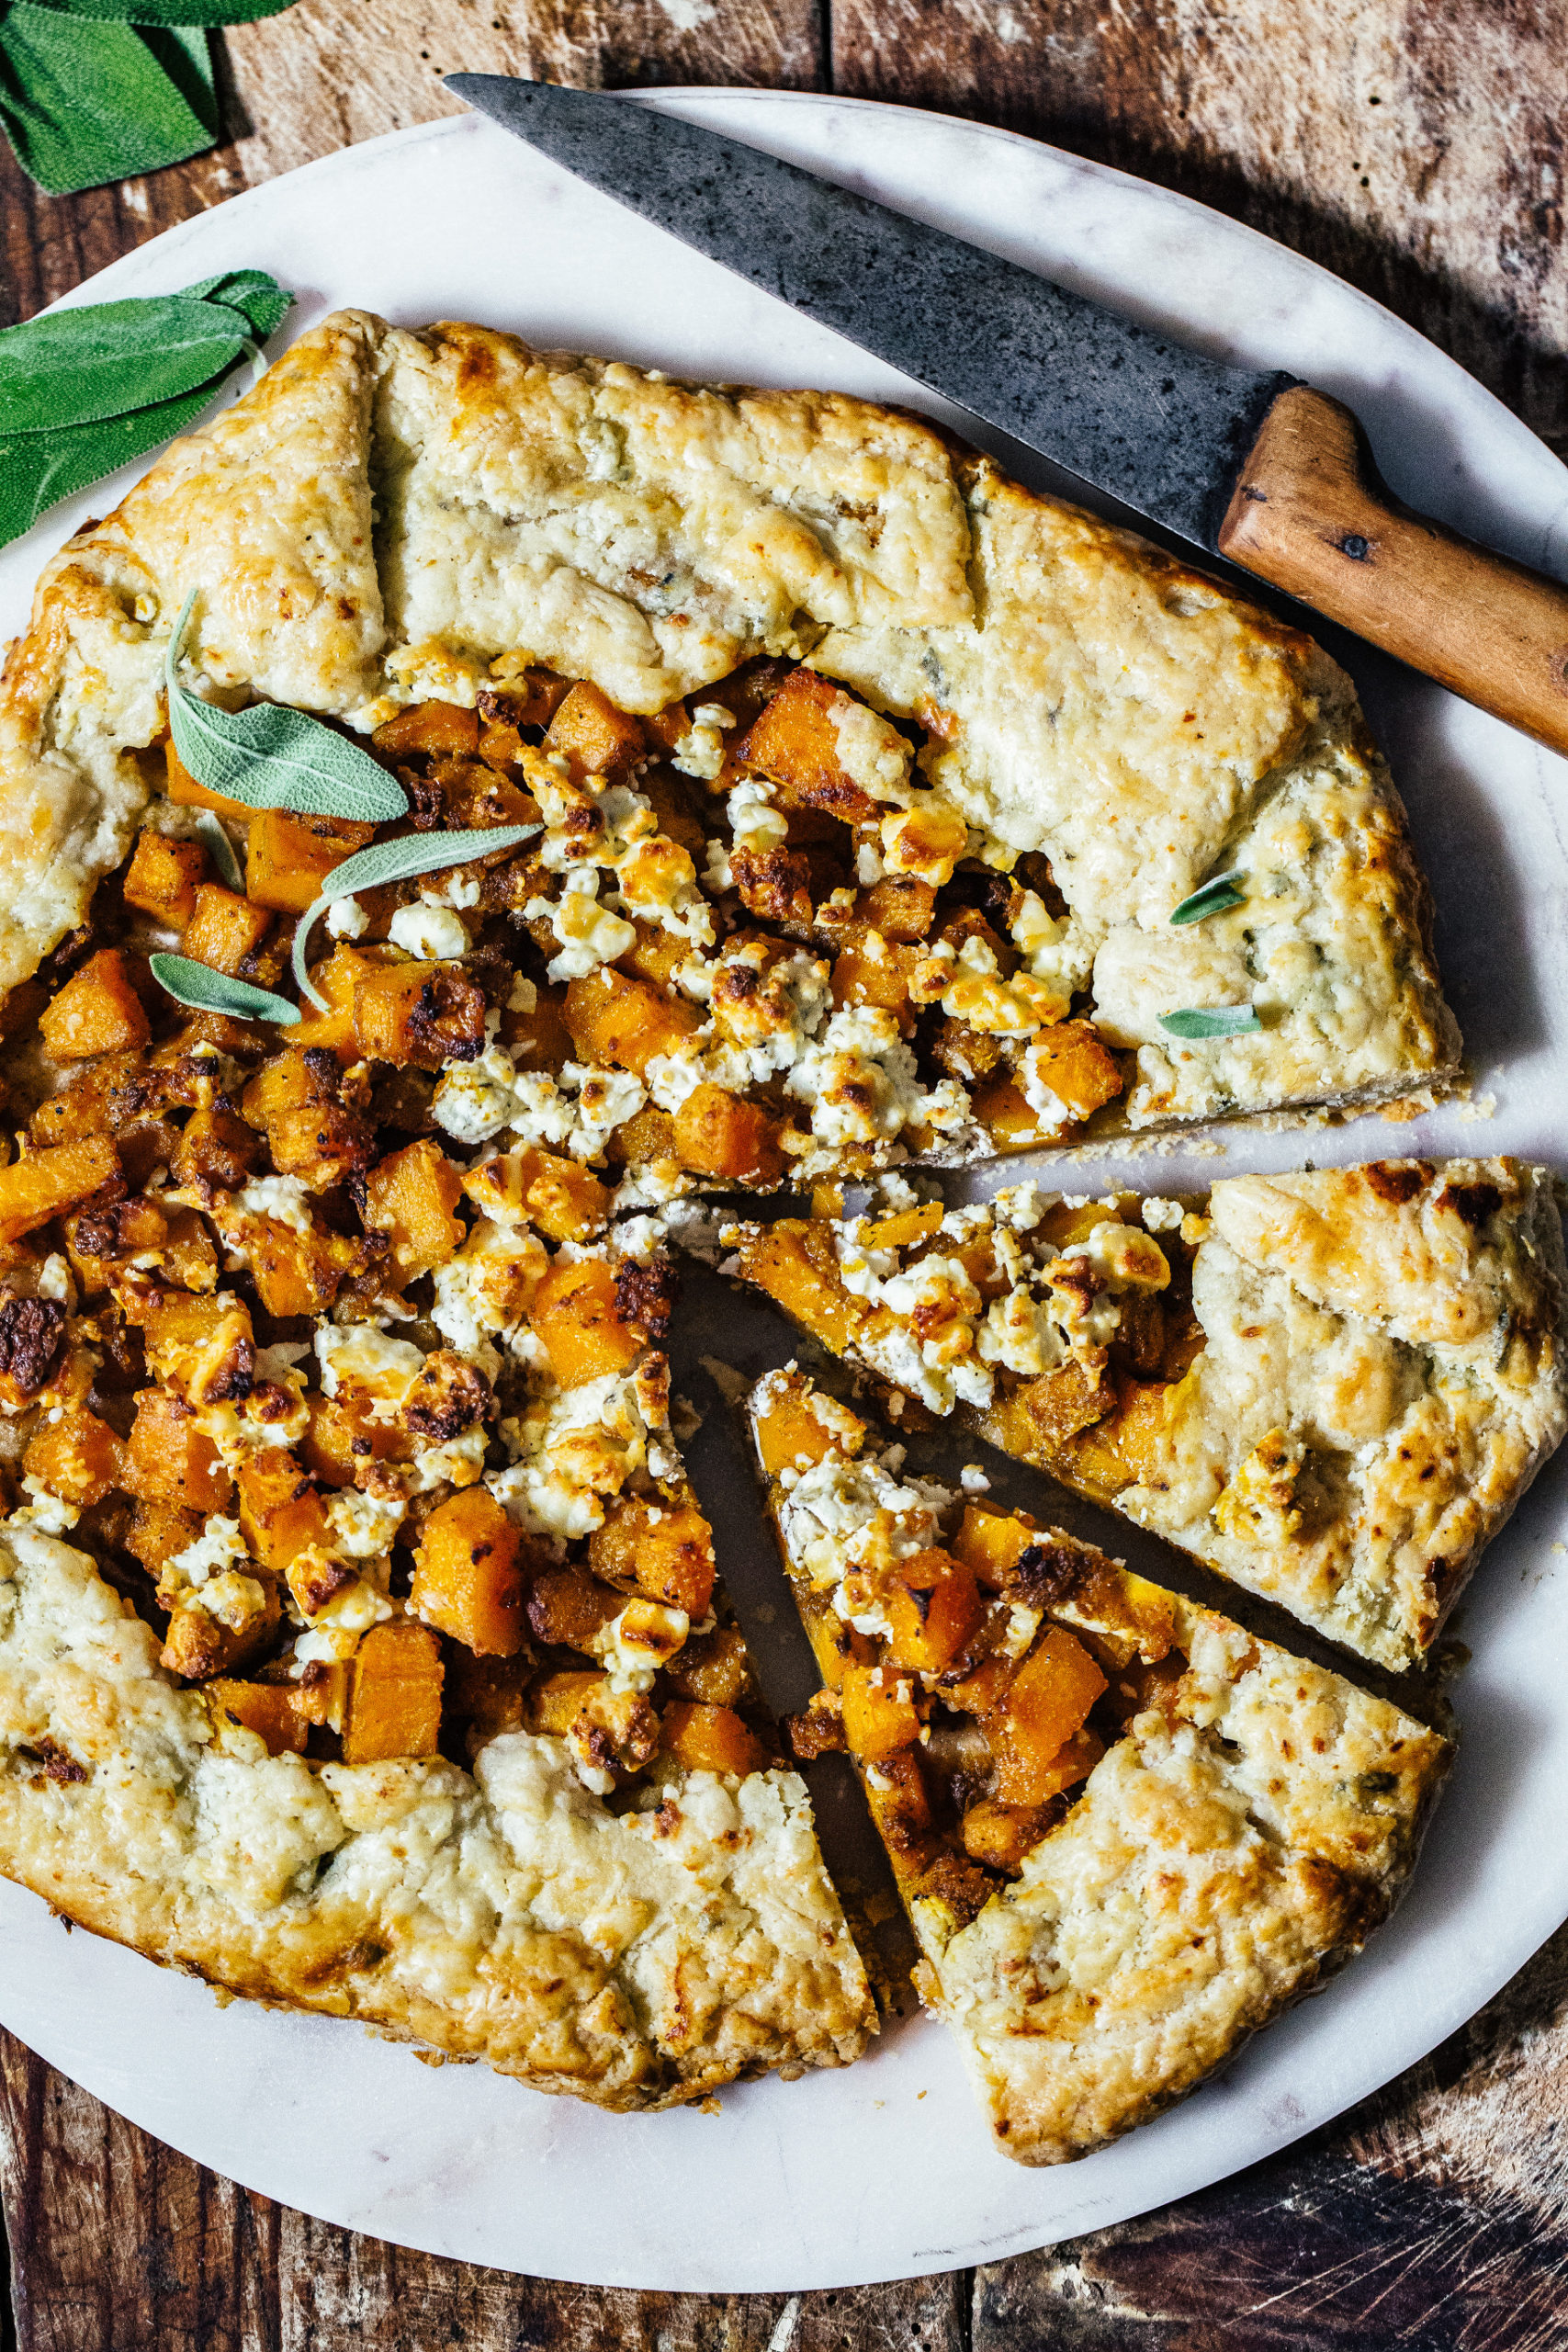
: UPDATED 11/2023 : The flakiest pastry, infused with earthy, woodsy sage, stands as the base for this absolutely delicious autumnal galette. A Feta and Butternut Squash Galette with Sage Pastry – the perfect fall galette – is such a nice thing to set out on any fall table, be it brunch, lunch, dinner or otherwise. Cut into fat slices, and served with a simple green salad, this mostly savory (but just a little bit sweet) galette eats great either warm or at room temperature. The trick? As with most pastries … it’s all in the pastry. Imagine that.


What is a Galette?
A galette is essentially the most gloriously rustic, open-faced pie you’ll ever eat. It’s is a pastry-based thing, that can be either savory or sweet – depending on the filling you choose. Galettes consist of a single crust that is filled with either vegetable or fruit fillings of all different sorts, and then secured around the edges by casually folding the pie crust up and over the edges of the filling, creating that beloved, delightfully rustic, perfectly imperfect aesthetic for which galettes are so admired. At least by me, they are.
Where do Galettes come from?
France. Normandy, to be exact! The word “galette” actually stems from the Norman word “gale,” which means flat cake. It is kind of a catch-all term used in French cooking to designate free-form, flat cakes and pastries of the like (not to be confused with a Breton galette).


Homemade Galette FAQ’s
What is the difference between a galette and a crostata?
Well, there isn’t really one. As it turns out, a galette and a crostata are basically the same thing (the former French, the latter Italian). Both crostatas and galettes are free-form and wonderfully rustic, with the dough edges folded up around the filling, which can be sweet or savory.
Can you make a Galette with store-bought pie dough?
Yep. absolutely. I’ve done this countless times, and I think it’s an awesome way to really get a galette on the table in a hyper fast sort of way. So, if you like – you can take my quick-fix option and simply thaw and roll out a frozen or refrigerated pie crust, roll/press some chopped sage right into it, and then proceed with the recipe and filling as it’s written. No harm, no foul. The difference is that store-bought dough isn’t going to ever be as flaky and buttery as one you’ve made yourself. But sometimes in the name of sheer efficiency, that’s just fine.
How do you re-heat a galette?
One of the things I most appreciate about the rusticity of a good galette, is not only the fact that they’re lovably imperfect, but that you can eat them very hot, straight outta the oven. You can eat them cooled all the way down to room temperature. You can eat them cold, right out of the fridge (if you’re not especially patient). And what’s more, you can re-heat them from cold to warm to piping hot again, without really screwing anything up.
Reheating a galette from Room Temperature:
Place the squash galette (or any galette) onto a sheet pan or baking tin of some sort and bake in a 350-degree oven until the filling is warm (not hot) and the pastry has re-crisped. This should only take about 8 to 10 minutes.
The butter will come back to life and get that pastry back to crispy for you as it warms.
Reheating a galette from frozen:
I find it’s best to re-heat from room temperature, but if you don’t feel like taking the time to thaw out your frozen galette, simply place it in the oven on the sheet pan/baking tin and allow it to warm up from frozen. It will take longer this way but should be warm and re-crisped after about 15 to 17 minutes. Covering the galette loosely with foil as it warms is a good idea also, as it will prevent further browning of the top and pastry edges.
Can you freeze a galette?
Yes! I honestly usually double the recipe when I make almost any pie or galette like this, and I’ll wrap one of them up, after baking and then cooling all the way to room temperature, and keep in the freezer until I get the craving again. They’ll last up to 3 months if you make sure they’re wrapped really well. A heavy-duty freezer bag plus some plastic wrap should do the trick. You mostly just want to prevent freezer burn of any sort, or any ice crystals form forming on the pastry, thus compromising its flakiness.

The best galette starts with the best pastry
I’ve shared a more in-depth post about the making of homemade pie crust here. It’s totally killer, works every single time and stands as a beautiful base for everything from apple pies and chess pies to galettes and even homemade Toaster Strudels (you could use it in place of store-bought puff pastry, if you wanted). Thank you, Alison Roman! This recipe is gold.
Butternut Squash Galette Ingredients
- One recipe “The Only Pie Crust” from Alison Roman, with sage option, or your favorite pie crust recipe, or one store-bought pie crust (see note below about the sage).
- 1 medium butternut squash
- 1 TBSP olive or vegetable oil
- Salt and pepper, to taste
- ⅔ cup crumbled feta cheese
- Buttermilk or whole milk, for brushing
- Fresh sage, for garnish
- Hot honey, for drizzling (optional)
How to make this Butternut Squash Galette
- Preheat the oven to 375 degrees F. Place the squash (whole, unpeeled) in the oven, directly on the rack. Roast for 40 minutes. This will make it very easy to cut and seed the squash.
- Trim/peel the squash, cut in half and scoop out/discard the seeds. Cut the squash up into small-diced, bite-sized pieces.
- Add the oil to a large skillet set over medium heat. Add the squash, season with salt and pepper to taste, and cook until tender and lightly browned; about 8 minutes, stirring occasionally. You can add more oil, of necessary, to keep things from sticking.
- Preheat the oven to 375 degrees F. Adjust the rack to the middle position.
- Roll out the pastry into a large, thin circle about 14 inches in diameter. You might not need all of the pastry for this, but I like starting with a lot and trimming, if needed. You’re looking for a 14-inch circle with a thickness of about ⅕-inch (thin – the thinner the better).
- Pile the squash into the center of the pastry, leaving at least a 1.5-inch border. Sprinkle with the feta. Working in sections (as pictured), fold the pastry border up and over just the outer edges of the filling, creating the classic, rustic galette shape. Brush the pastry with buttermilk or whole milk.
- Bake your butternut squash galette for 45 to 50 minutes, or until golden brown and the pastry is totally cooked all the way through. If you need to keep cooking the pastry (if yours is a little thicker). Simply lay a sheet of foil over the galette, to prevent excessive browning, and keep baking until the pastry is done.
- Top the butternut squash galette with extra fresh sage, if desired, and a healthy drizzle of hot honey.


How to store this Butternut Squash Galette
This butternut squash galette will keep for you, wrapped up and/or covered, in a cool, dry place for up to 3 days before the pastry starts to lose its luster.
Serving Suggestions for your Feta and Butternut Squash Galette
- This butternut squash galette makes for a very bistro-esque, vegetarian meal when served alongside a simple green salad.
- If you want to add a little meaty florish to the situation here, some crumbled bacon is really delicious when sprinkled over top. Pan-crisped prosciutto is also lovely.
- This butternut squash galette makes for a great Friendsgiving or Thanksgiving pot luck recipe, because it travels really well. It’s sturdy and heats back up well in a warm oven


If you like the looks of this Feta and Butternut Squash Galette with sage Pastry, you might also want to check out:
Garlicky Orange Chili Squash with Sage
Warm Squash and radicchio Salad with Caramelized Dates
Creamy Cacio e Pepe Spaghetti Squash
Tunisian Harissa Chicken and Olive Skillet


Feta & Butternut Squash Galette with Sage Pastry
A perfectly buttery, autumnal take on a savory galette, this one utilizes the great friendship of salty, punchy feta with sweet, creamy butternut squash. The addition of sage secures this galette as a perfect-for-fall seasonal stunner that will make any table happy. I like to drizzle the finished, warm galette with some hot honey – but that’s totally gilding the lily, and not necessary. But it’s wonderful all the same. NOTE: the pastry needs to rest in the fridge for 2 hours before using.
- Yield: 1 galette 1x
Ingredients
- One recipe for this Pie Crust, with sage option, or your favorite pie crust recipe, or one store-bought pie crust (see note below about the sage).
- 1 medium butternut squash
- 1 tablespoon olive or vegetable oil
- Salt and pepper, to taste
- 2/3 cup crumbled feta cheese
- Buttermilk or whole milk, for brushing
- Fresh sage, for garnish
- Store-bought hot honey, for drizzling (optional)
Instructions
- Preheat the oven to 375 degrees F. Place the squash (whole, unpeeled) in the oven, directly on the rack. Roast for 40 minutes. This will make it very easy to cut and seed the squash.
- Trim/peel the squash, cut in half and scoop out/discard the seeds. Cut the squash up into small-diced, bite-sized pieces.
- Add the oil to a large skillet set over medium heat. Add the squash, season with salt and pepper to taste, and cook until tender and lightly browned; about 8 minutes, stirring occasionally. You can add more oil, of necessary, to keep things from sticking.
- Preheat the oven to 375 degrees F. Adjust the rack to the middle position.
- Roll out the chilled pastry (either store-bought or homemade) into a large, thin circle about 14 inches in diameter. You might not need all of the pastry for this, but I like starting with a lot and trimming, if needed. You’re looking for a 14-inch circle with a thickness of about ⅕-inch (thin – the thinner the better).
- Pile the squash into the center of the pastry, leaving at least a 1.5 to 2-inch border. Sprinkle with the feta. Working in sections (as pictured), fold the pastry border up and over just the outer edges of the filling, creating the classic, rustic galette shape. Brush the pastry with buttermilk or whole milk.
- Bake for 45 to 50 minutes, or until golden brown and the pastry is totally cooked all the way through. If you need to keep cooking the pastry (if yours is a little thicker). Simply lay a sheet of foil over the galette, to prevent excessive browning, and keep baking until the pastry is done.
- Top with extra fresh sage, if desired, and a healthy drizzle of hot honey.
Keywords: Butternut Squash Galette


