
:: Soft and Buttery Homemade Garlic Knots :: Bread making can be fraught with fear, intimidation and a mess of pre-conceived notions that might prevent a home cook from ever giving it a go. It’s got a tough rep and a bad wrap sometimes, but I’m here today to assure you that making delicious breads at home is truly simple and often just boils down to ensuring you’ve got the correct ingredients and that you follow the instructions.
Unlike cooking, bread making does, in fact, exist in the scientific realm of baked goods and we mustn’t stray from the orderly lines of our dear recipes if we want to ensure success. If you can do that (i.e. read and follow instructions), then you’ve got the tools to knock your bread making endeavors out of the park (out of the kitchen?).
Speaking of recipes, these Soft and Buttery Homemade Garlic Knots are a wonderful way to gently ease into the world of home bread making if you’re a newcomer and a great skill to add to your repertoire if your bread making adventures are already well underway.


How to Make Fantastic Homemade Garlic Knots
This is a very straightforward yeasted dough that by any other name is really a pizza dough. But, here it is fortified with the flavor of garlic and then taken down a different path, so far as the actual working of the dough goes.
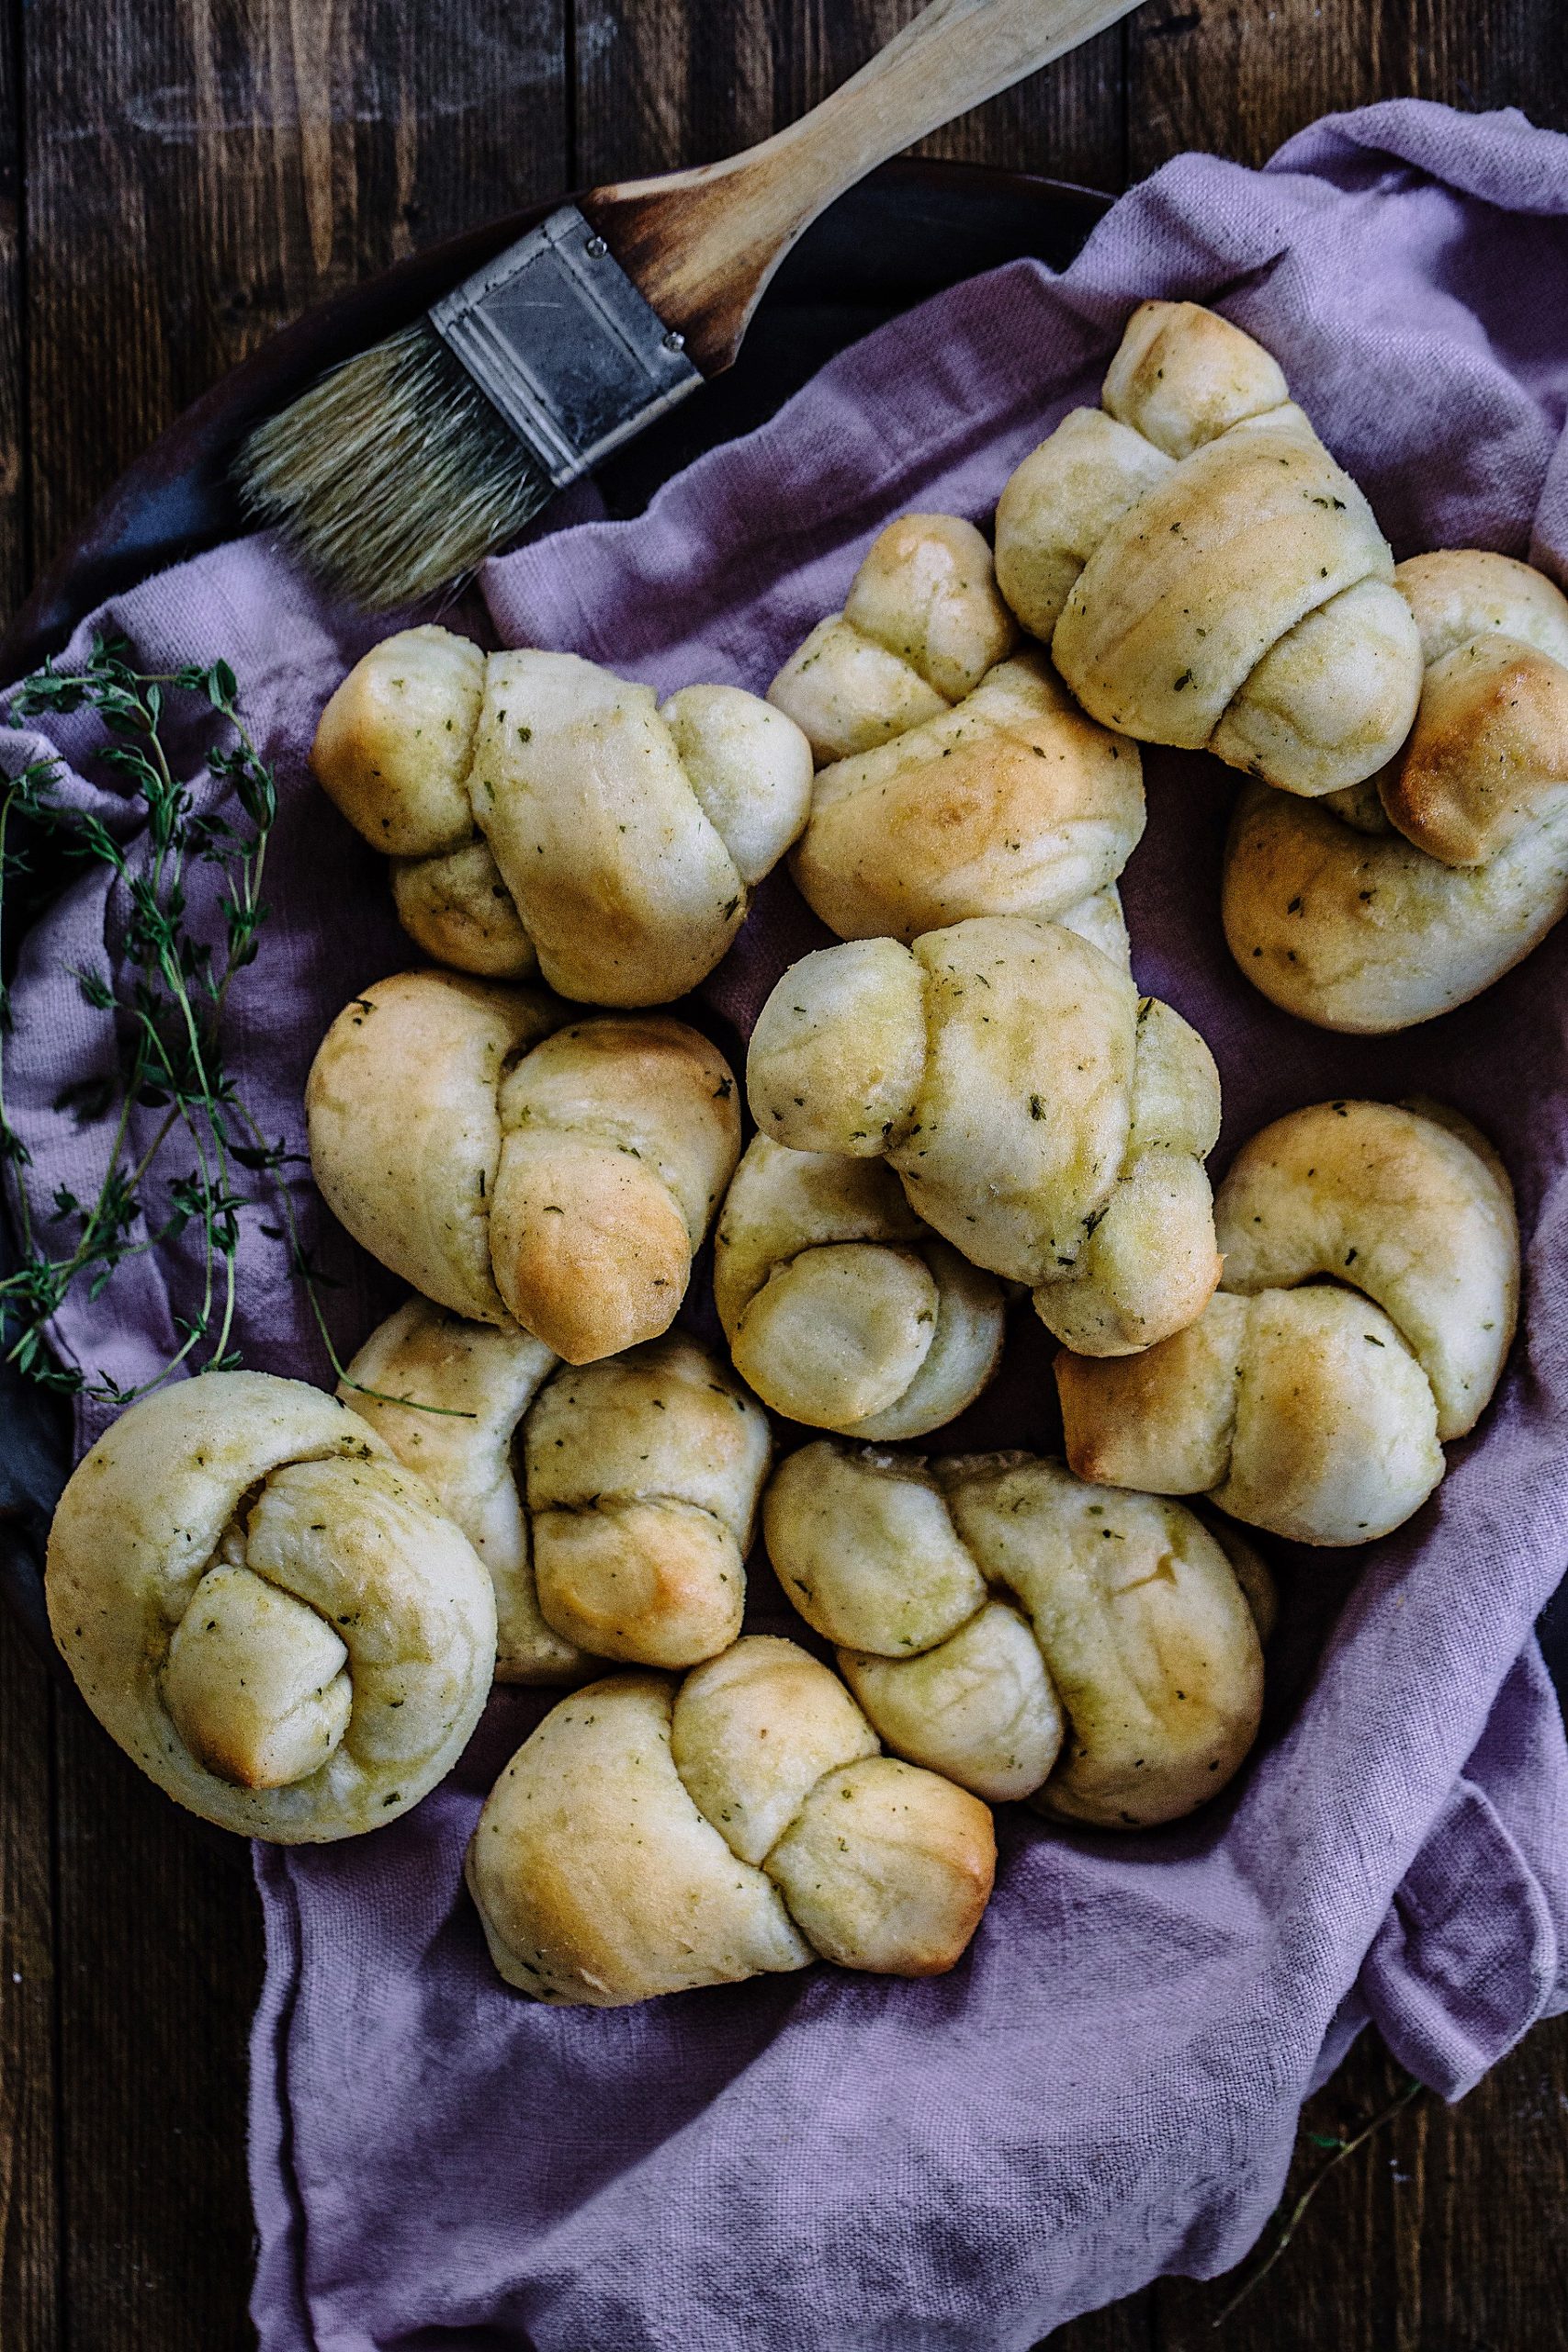
Rather than rolling it out into a flat, pizza-like disc, we’ll create long strands of the dough (nine to be exact) and then tie them into the iconic knot shape. Honestly it’s very hard to screw that part up. Can you tie your shoe laces? You’re all set! You’ve got this.
That said, here are a few tips to help ensure your homemade garlic knots come out beautifully each and every time:
Tips for Garlic Knot Success
- Flour Power. You’ll notice in my recipe today that I call for bread flour, rather than all-purpose. Now, if you have like, an obscene amount of AP flour in your pantry and really want to use it up, then yes, you can go ahead and sub that in for the bread flour. But bread flour has a higher protein content and therefore creates a higher gluten amount which leads to stretchier, chewier knots in the end (this is a good thing).
- Rise baby rise. You’ll want to make sure you give your dough the chance to fully double in size (this is called proofing) before punching it down and then dividing it into the pieces for your knots. It takes about 30 minutes for these knots, but it’s okay if yours need a little longer. This good, full proof will give you the best texture in the end. I find that simply placing the bowl of dough right on the oven as it preheats perfectly creates the semi-warm-ish environment that proofing dough loves.
Tips for Freezing and Storing your Garlic Knots
As if these knots weren’t already wonderful just as they are, they come with the added bonus of being very freezer friendly. You can freeze fully baked knots in a freezer-safe bag or container for up to 2 months.
And if you want more of a bake-on-demand knots situation, where you just grab a knot or two when a craving strikes, then you can freeze the unbaked knots for up to 3 months. I simply place the unbaked knots on a plate or tray and pop them in the freezer to freeze through, and them I throw them in a freezer-safe bag or container (the pre-freezing keeps them from sticking together). Thaw to room temperature and then bake as directed. Proceed with the garlic butter after baking, as directed in the recipe.
Once your knots have been baked, they’ll last for a day or two, when kept in a sealed container.


Soft & Buttery Homemade Garlic Knots
Fluffy pillows of twisted homemade garlic bread, twisted into perfectly poppable knots. A pizza parlor classic that can be made easily – and better – right in your own kitchen. This is a DIY must for garlic and carb lovers everywhere.
- Yield: 9 knots
- Method: Baking
Ingredients
2 to 2-1/3 cups bread flour, divided
1 packet instant yeast (2-1/4 tsp)
1-1/2 tsp sugar
3/4 tsp salt
1 tsp garlic powder
2 TBSP olive oil, plus extra as needed
3/4 cup lukewarm water (about 105 – 115 degrees F)
For the Garlic Butter:
5 TBSP salted butter
3 cloves minced or grated garlic (about 1 ½ TBSP)
1 TBSP minced fresh basil or parsley
Instructions
- Preheat your oven to 400 degrees F and line a baking sheet with parchment paper. Set aside.
- In a large bowl, combine 1 cup of the bread flour with the yeast, sugar, salt, and garlic powder. Stir well. Add the 2 TBSP of olive oil and ¾ of warm water and stir with a wooden spoon until everything is well-combined.
- Add another cup of flour. Stir to incorporate. Now you should add any extra flour that you need for the dough to come together and be workable. I usually use up to 1/3 cup more here. You’re looking for a sticky, tacky dough that is workable with your hands. Continue to stir until your dough forms a ball and starts to pull away from the sides of the bowl.
- Place your dough on a floured work surface and give it a good knead; about 2 to 3 minutes worth of kneading.
- Drizzle a separate, large bowl with olive oil and, using either your fingers or a pastry brush, grease the sides of the bowl.
- Place your dough in the oily bowl and give it a toss around, letting the dough the nice and greased. Cover the bowl tightly with plastic wrap and place in a warm-ish place to rise for 30 minutes or until it has doubled in size. I usually set it on top of the oven.
- When your dough has risen, punch it down with your fist to deflate it, and transfer it to a lightly floured work surface. Form into a log about 15” long and slice into 9 equally sized pieces.
- Roll each piece between your hands and gently tug and pull it to form a rope about 8” long (lightly dust the dough with flour if needed). Carefully tie each rope into a knot and place on your prepared baking sheet. Lightly brush with olive oil.
- Set the baking sheet on top of your preheated oven and let your knots rest and proof for 10 minutes.
- Transfer the baking sheet to the oven and bake for 12 to 14 minutes, or until they just begin to lightly brown. While the knots are baking, make the garlic butter.
To Make the Garlic Butter
- Combine the butter and garlic in a small saucepan over medium/low heat. Cook until the butter is melted and you can smell the garlic.
- Remove from the heat and stir in the minced herbs (basil or parsley or a combo of both). Once your knots have finished baking, use a pastry brush to generously slather the garlic butter over all of your knots. Enjoy warm.
Keywords: Soft and Buttery Homemade Garlic Knots


